WSL 使用 Clash 代理
大约 1 分钟
WSL 使用 Clash 代理
一、原理说明
WSL2 使用的是虚拟网络环境:
- WSL ≠ Windows 本机
- 无法直接使用
127.0.0.1 - 必须通过 Windows 宿主机 IP 进行通信
二、Clash for Windows 设置
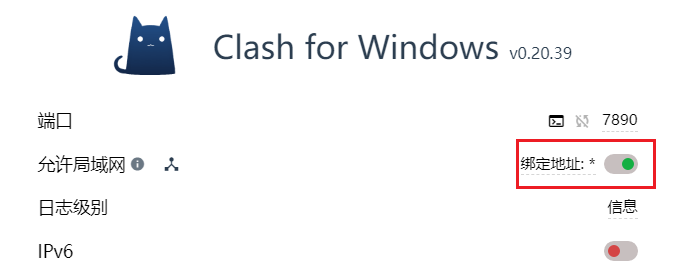
- 默认端口:
7890(Mixed Port) - 必须开启:允许局域网(Allow LAN)
否则 WSL 无法访问代理
三、WSL 配置代理
在 WSL 中执行如下命令
# 1. 获取 Windows 宿主机的 IP
export hostip=$(cat /etc/resolv.conf | grep nameserver | awk '{print $2}')

# 2. 设置环境变量
export http_proxy="http://${hostip}:7890"
export https_proxy="http://${hostip}:7890"

# 3. 测试是否成功
curl -I https://www.google.com
cat /etc/resolv.conf | grep nameserver 解读
cat /etc/resolv.conf: 读取 WSL2 的 DNS 配置文件。grep nameserver: 只保留包含 "nameserver" 关键字的那一行
但是不一定会真正的成功
常见报错
curl: (7) Failed to connect to 10.255.255.254 port 7890 after 0 ms: Connection refused 说明是 IP 有问题
修复问题:
export hostip=$(ip route | grep default | awk '{print $3}')
export http_proxy="http://${hostip}:7890"
export https_proxy="http://${hostip}:7890"
curl -I https://www.google.com
四、WSL 设置开机自动连接
待补充
五、Windows CMD 代理
众所周知 windows 的 cmd 也是不能使用 VPN 的那么一样需要代理
set http_proxy=http://127.0.0.1:7890
set https_proxy=http://127.0.0.1:7890