微信支付API v3
微信支付API v3
背景
微信支付推出了API v3,相对于之前的安全性更高但是对接稍微麻烦了一点,官方文档虽然很全,但是连贯性不是很好,让人不能很丝滑的拷贝,我就用我自己实现的思路总结一下。
一、关于商户API证书
1、申请API证书
我们先登录微信支付商户平台进入【账户中心】->【API安全】
登录地址:https://pay.weixin.qq.com/index.php/core/home/login
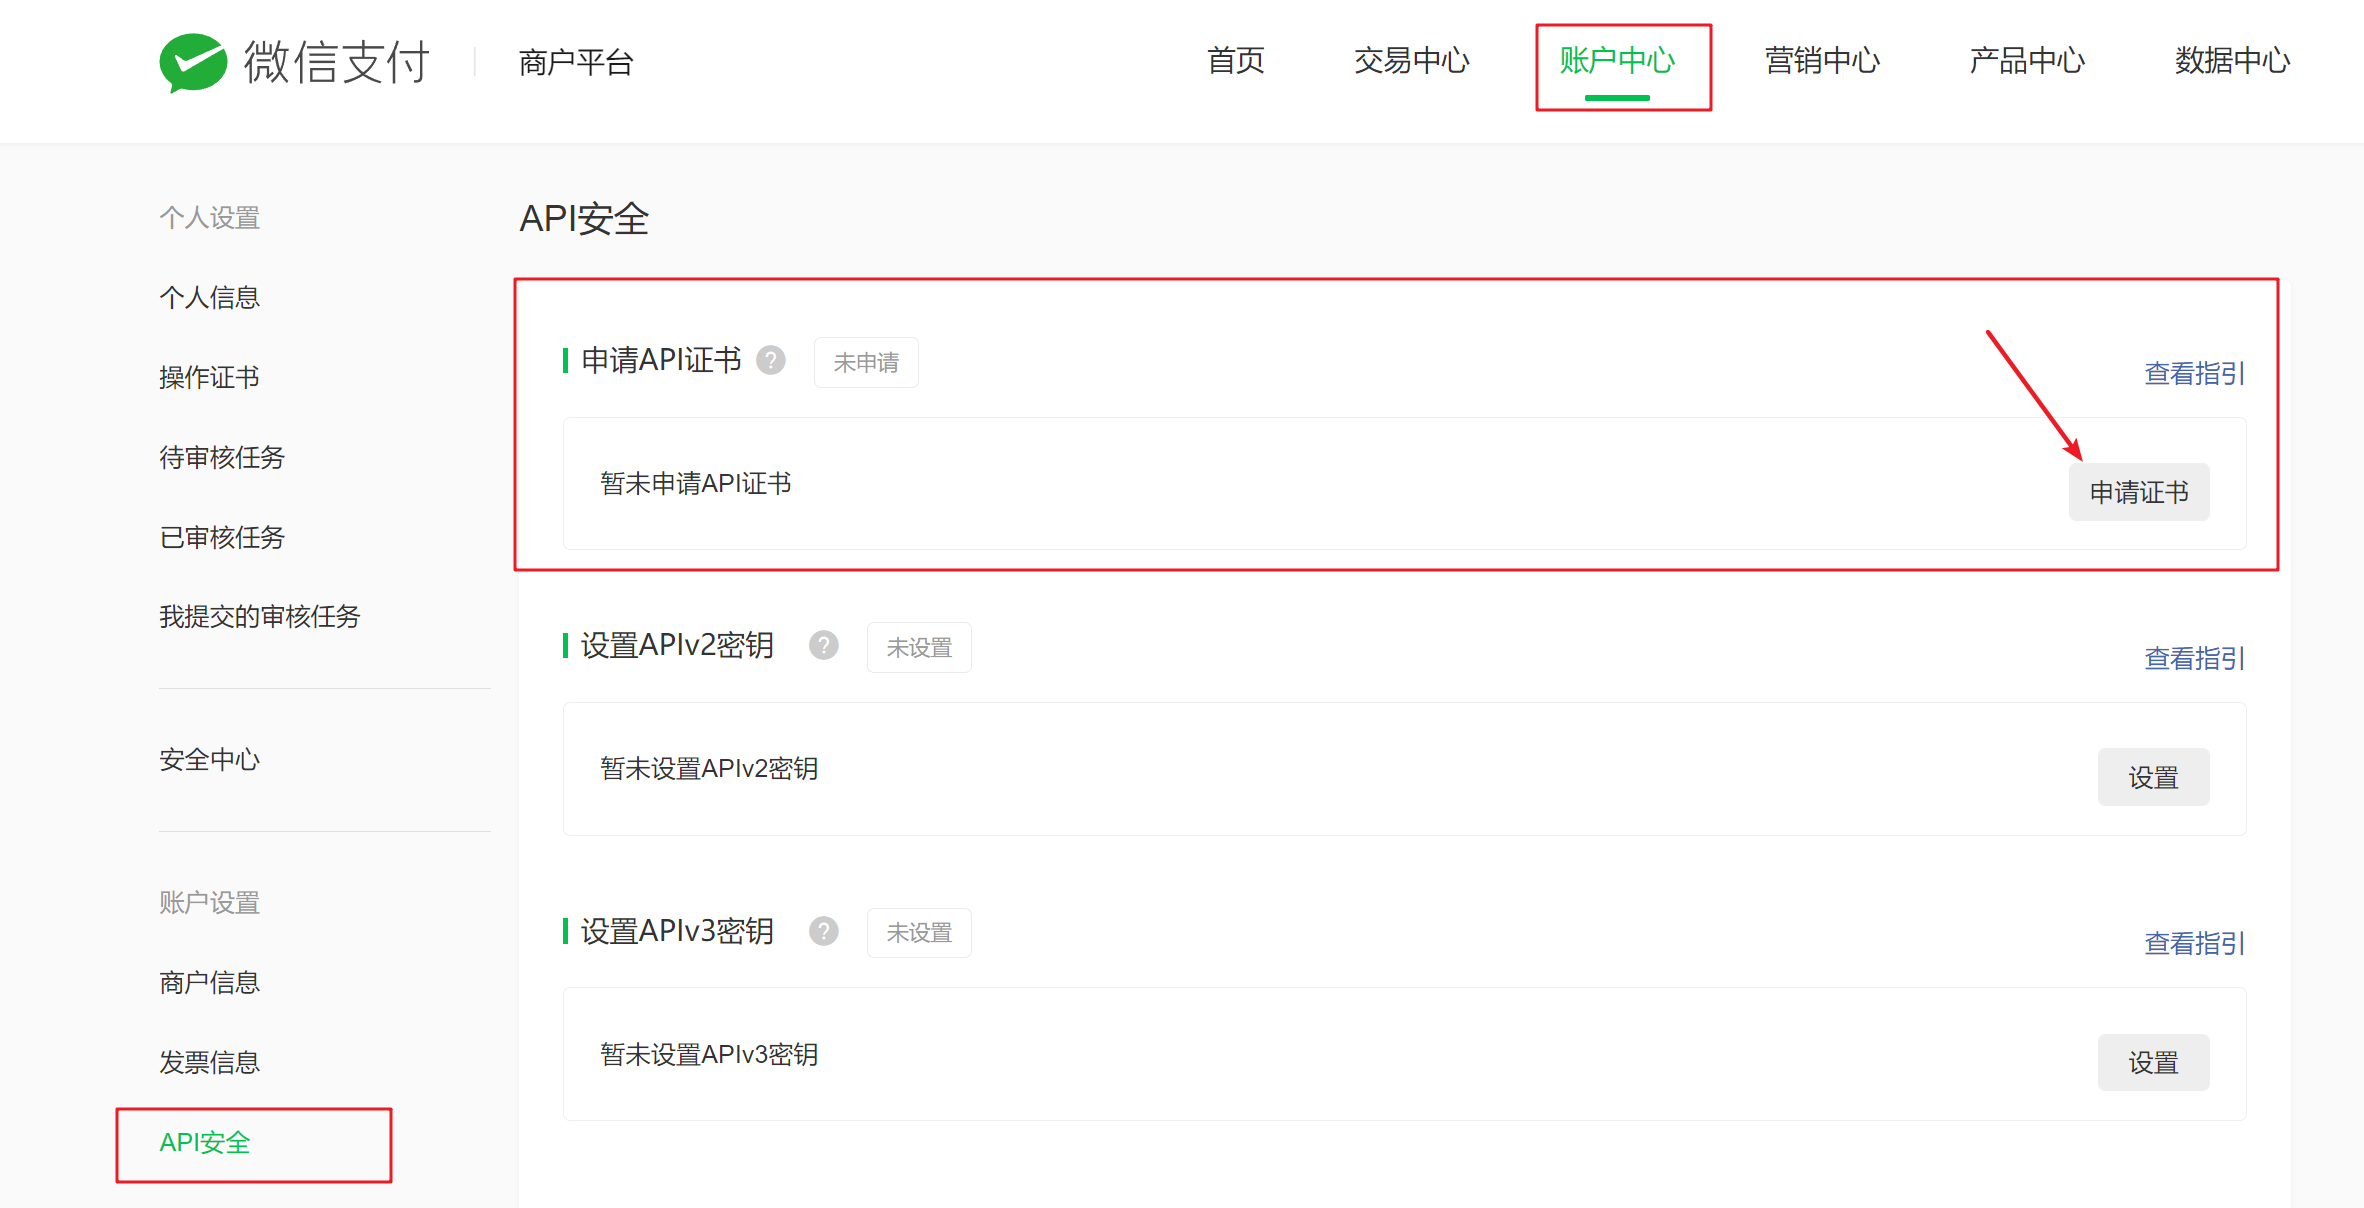
这里有个【申请证书】,先申请一下证书
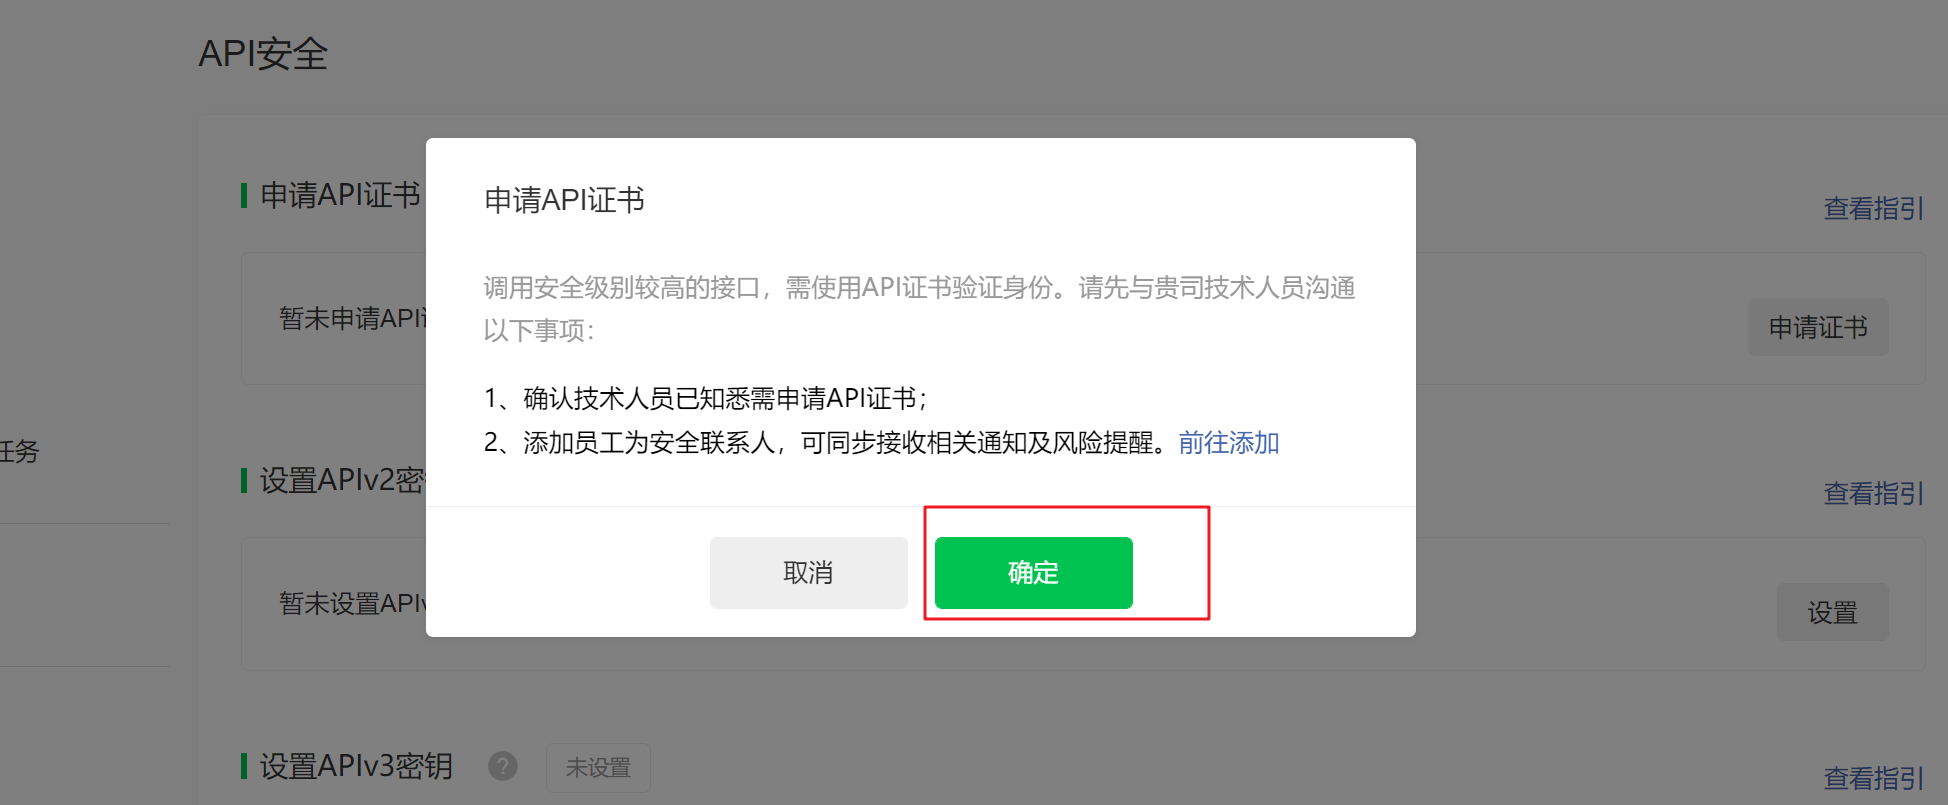
申请步骤:
参考官方文档:https://kf.qq.com/faq/161222NneAJf161222U7fARv.html
按照官方文档操作完毕后会生成一个文件夹,里面有4个文件,如下图

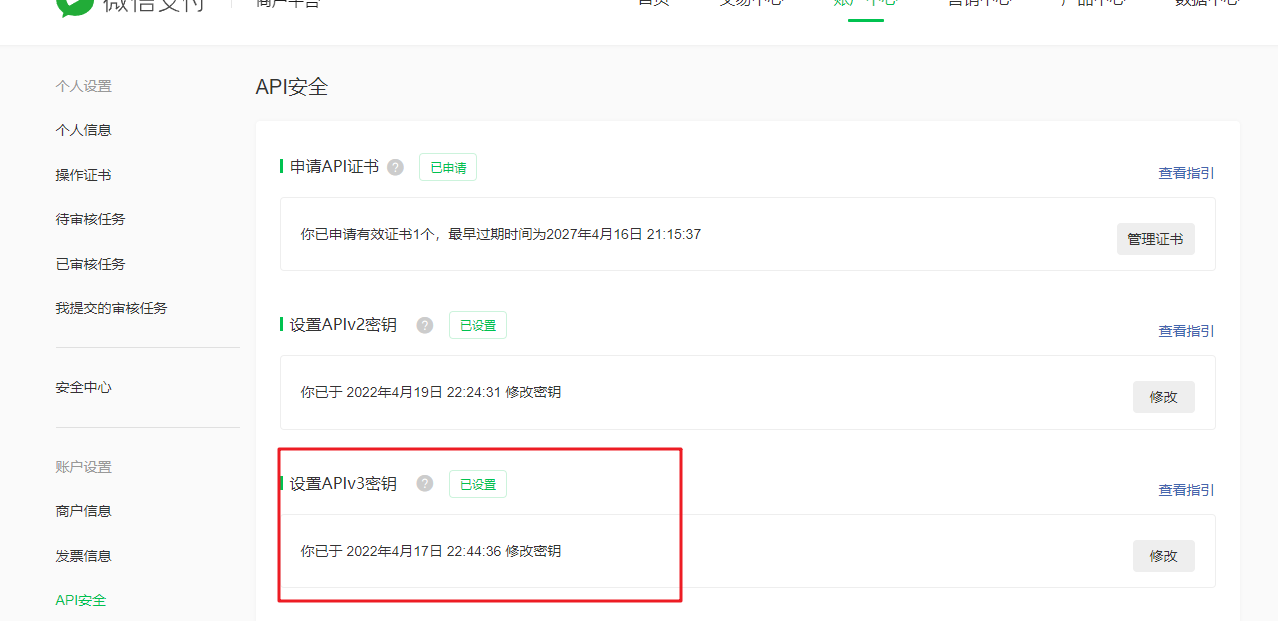
2、设置APIv3密钥
设置这个是为了接收微信回调用的,后面会讲
不会的同学可以参考文档:https://kf.qq.com/faq/180830E36vyQ180830AZFZvu.html
二、签名和验证
配置工作做完,又到了大家最喜欢的拷贝代码环节了
官方文档给出了SDK,并且推荐使用,那我们就直接使用restfulAPI请求。
1、签名生成
官方文档参考:https://pay.weixin.qq.com/wiki/doc/apiv3/wechatpay/wechatpay4_0.shtml
1.1 构造签名
签名串一共有五行,每一行为一个参数。行尾以 \n(换行符,ASCII编码值为0x0A)结束,包括最后一行。如果参数本身以\n结束,也需要附加一个\n。
 HTTP请求方法\n
 URL\n
 请求时间戳\n
 请求随机串\n
 请求报文主体\n
说明
HTTP 请求方法是指 GET、POST、PUT、DELETE 等,注意这里使用的是大写字母;URL 是指请求的 api 接口地址,带https的完整地址,时间戳获取当前时间戳即可;请求随机数随便给给就行;请求报文主体 GET 就传空(空的情况下 \n 不能少),POST 传请求体...
1.2 计算签名值
提示
绝大多数编程语言提供的签名函数支持对签名数据进行签名。强烈建议商户调用该类函数,使用商户私钥对待签名串进行SHA256 with RSA签名,并对签名结果进行 Base64编码 得到签名值。
1.3 设置HTTP头
微信支付商户API v3要求请求通过HTTP Authorization头来传递签名。 Authorization由认证类型和签名信息两个部分组成。
注意
在这里官方文档只是说设置 Authorization ,但是实际并不是只设置这一个,在另一个地方(点击这里)说了另外两个参数 Accept 和 User-Agent ,
代码演示(验证签名是否正确)
提示
以 https://api.mch.weixin.qq.com/v3/certificates 接口为例,这个接口可以返回[证书序列号]如果返回的证书序列号和你自己的相同,则说明正确,反之则错误。
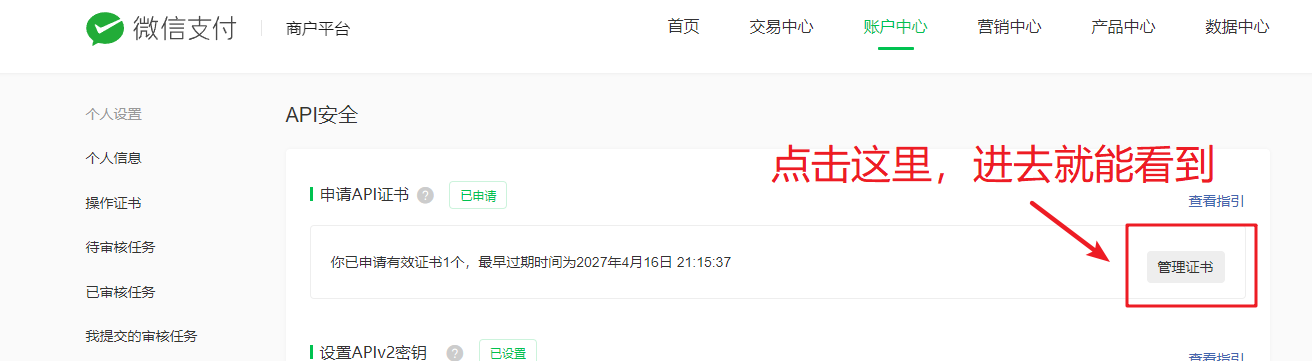
查看自己的证书序列号:
1.4 代码演示
<?php
class Demo
{
    //商户号
    protected $mchid = "xxxxxxxx";
    //证书序列号
    protected $serial_no = "XXXXXXXXX";

    //示例获取正式序列号
    public function example()
    {
        $url = "https://api.mch.weixin.qq.com/v3/certificates";
        $privateKey = $this->getPrivateKey();
        $sign = $this->getSignature("GET", $url, "", $privateKey);
        $header[] = 'User-Agent: https://zh.wikipedia.org/wiki/User_agent';
        $header[] = 'Accept: application/json';
        $header[] = 'Authorization: WECHATPAY2-SHA256-RSA2048 ' . $sign; //注意拼接地方有空格
        $back = $this->httpRequest($url, $header);
        var_dump(json_decode($back, true));
    }

    //获取私钥
	private function getPrivateKey()
    {
        $filePath = "文件地址,就是上面那个打死也不能让人知道的文件地址";
        return openssl_get_privatekey(file_get_contents($filePath));
    }

    //获取签名
    protected function getSignature($method, $targetUrl, $body, $privateKey)
    {
        $url_parts = parse_url($targetUrl);
        $canonical_url = ($url_parts['path'] . (!empty($url_parts['query']) ? "?${url_parts['query']}" : ""));
        $timestamp = time();
        $nonceStr = $timestamp . mt_rand(10000, 99999);
        $message = $method . "\n" .
            $canonical_url . "\n" .
            $timestamp . "\n" .
            $nonceStr . "\n" .
            $body . "\n"; //注意这里不能用PHP_EOL
        openssl_sign($message, $raw_sign, $privateKey, "sha256WithRSAEncryption");
        $sign = base64_encode($raw_sign);
        $token = sprintf('mchid="%s",nonce_str="%s",signature="%s",timestamp="%d",serial_no="%s"',
            $this->mchid, $nonceStr, $sign, $timestamp, $this->serial_no);
        return $token;
    }
}
三、下单接口
我们以JSAPI下单为例
官方文档:https://pay.weixin.qq.com/wiki/doc/apiv3/apis/chapter3_1_1.shtml
1、代码演示
<?php
class Demo
{
    //商户号
    protected $mchid = "xxxxxxxx";
    //小程序appid
    protected $appId = "xxxxx";

    //创建支付订单
	public function createPayOrder($orderNo, $description, $price, $openid)
    {
        $privateKey = $this->getPrivateKey(); //上面的demo里有
        $prepayId = $this->getPrepayId($description, $orderNo, $price, $openid);
        if (empty($prepayId)) return '';
        $timestamp = time();
        $nonceStr = mt_rand(10000, 99999);
        $message = self::$appId . "\n" .
            $timestamp . "\n" .
            $nonceStr . "\n" .
            "prepay_id=" . $prepayId . "\n";
        openssl_sign($message, $raw_sign, $privateKey, "sha256WithRSAEncryption");
        $sign = base64_encode($raw_sign);
        return [
            'timeStamp' => $timestamp,
            'nonceStr' => $nonceStr,
            'package' => "prepay_id={$prepayId}",
            'signType' => 'RSA',
            'paySign' => $sign
        ];
    }

    //获取预支付id
    protected function getPrepayId($description, $orderNo, $price, $openid)
    {
        $targetUrl = "https://api.mch.weixin.qq.com/v3/pay/transactions/jsapi";
        $method = "POST";
        $body = json_encode([
            'appid' => $this->appId,
            'mchid' => $this->mchid,
            'description' => $description,
            'out_trade_no' => $orderNo,
            'notify_url' => 'https://xxxxxx', //回调地址(一定是要外网能访问的)
            'amount' => [
                'total' => 100 * $price,
                'currency' => 'CNY'
            ],
            'payer' => [
                'openid' => $openid
            ]
        ]);
        $privateKey = $this->getPrivateKey();
        $sign = $this->getSignature($method, $targetUrl, $body, $privateKey);//上面有
        $header[] = 'User-Agent: https://zh.wikipedia.org/wiki/User_agent';
        $header[] = 'Content-Type: application/json';
        $header[] = 'Accept: application/json';
        $header[] = 'Authorization: WECHATPAY2-SHA256-RSA2048 ' . $sign; //注意拼接地方有空格
        $res = $this->http_Request($targetUrl, $header, $body);
        $arr = json_decode($res, true);
        if (isset($arr['prepay_id'])) {
            return $arr['prepay_id'];
        }
        return "";
    }

    //curl请求
    function http_Request($url, $header = array(), $post_data = "")
    {
        $ch = curl_init();
        curl_setopt($ch, CURLOPT_URL, $url);
        curl_setopt($ch, CURLOPT_HTTPHEADER, $header);
        curl_setopt($ch, CURLOPT_SSL_VERIFYPEER, FALSE);
        curl_setopt($ch, CURLOPT_SSL_VERIFYHOST, FALSE);
        curl_setopt($ch, CURLOPT_RETURNTRANSFER, 2);
        if ($post_data != "") {
            curl_setopt($ch, CURLOPT_POST, TRUE);
            curl_setopt($ch, CURLOPT_POSTFIELDS, $post_data);
        }
        $output = curl_exec($ch);
        if ($output === FALSE) {
            $output = "curl 错误信息: " . curl_error($ch);
        }
        curl_close($ch);
        return $output;
    }
}
四、支付回调处理
文档里给出了三种方法,这里就不一一介绍了,直接使用libsodium
1、代码演示
<?php
class Demo
{
    protected $apiv3PrivateKey = "xxxxxxxxxxxxxxxxxxxxxxxxxxxxxxxx"//一、2设置的那个32位密码

    //解密
    public function decryptToString($associatedData, $nonceStr, $ciphertext)
    {
        $ciphertext = \base64_decode($ciphertext);
        if (strlen($ciphertext) <= 16) {
            return false;
        }
        // ext-sodium (default installed on >= PHP 7.2)
        if (function_exists('\sodium_crypto_aead_aes256gcm_is_available') && \sodium_crypto_aead_aes256gcm_is_available()) {
            return sodium_crypto_aead_aes256gcm_decrypt($ciphertext, $associatedData, $nonceStr, $this->apiv3PrivateKey);
        }
        throw new \RuntimeException('AEAD_AES_256_GCM需要PHP 7.1以上或者安装libsodium-php');
    }
}
以上的代码拷下来不一定能正常运行,因为PHP一般是没有libsodium这个扩展的,对PHP的版本也有一定要求(求求那些还在用5.6以下版本的老板赶紧把项目重构吧( ̄▽ ̄)")
2、扩展安装
官方说php版本大于7.2默认是安装了扩展的,只需要去php.ini开启扩展即可extension=php_sodium.dll
但是我这里没有看到(如果有的同学直接开启就行了)。
没有的就按照下面的步骤安装即可
Linux安装
下载:https://download.libsodium.org/libsodium/releases/
安装
./configure
make && make check
sudo make install
pecl安装
pecl install libsodium
添加到php.ini中
extension=sodium.so